Set up your own BYO modem
Set up checklist:
- For Fibre broadband, check that the modem is Fibre ready or Fibre capable. This means it has a WAN/Internet port to connect to the Fibre ONT box (Optical Network Terminal or Fibre box) with an Ethernet cable. Keep in mind that some routers may auto-sense for the WAN port, like the Deco X53-DSL does.
- For a VDSL or ADSL broadband connection, check that the modem is VDSL/ADSL ready and capable.
- You are quite comfortable setting up the modem.
- You are comfortable logging in to the modem and understand that you may need to change settings for it to work successfully on the One NZ network.
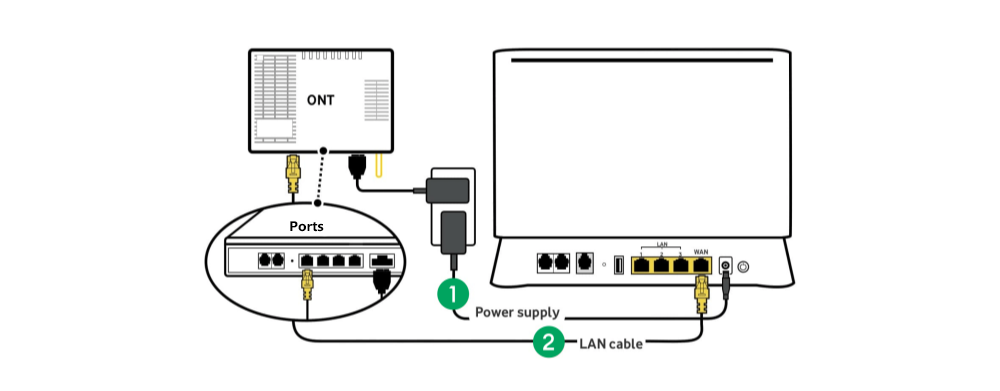
Steps to guide your modem set up.
1. Connect to power.
Plug your modem into a power plug near your ONT and switch it on. The ONT box is usually on the wall or at the point where your broadband connection enters the house.
2. Connect to your ONT box.
Plug your LAN/WAN Ethernet cable into the WAN/Internet port on your modem and into the appropriate Port of your ONT box.
3. Connect your devices.
Connect via Ethernet:
Connect your computer, or device, to a LAN port on your modem using an Ethernet cable.
Connect via WiFi:
Your modem may have your WiFi network name and Wireless Key code/Password on the back or bottom of the unit.
Alternatively, you may find this in your modem user guide. On your device, click on the WiFi symbol and select your WiFi network name.
4. Get online.
Try loading a few of your favourite websites. If you’re unable to get online, you may need to review and change your modem settings.
You might also have WiFi extenders, or WiFi 6 mesh units, which can also be connected to your modem.
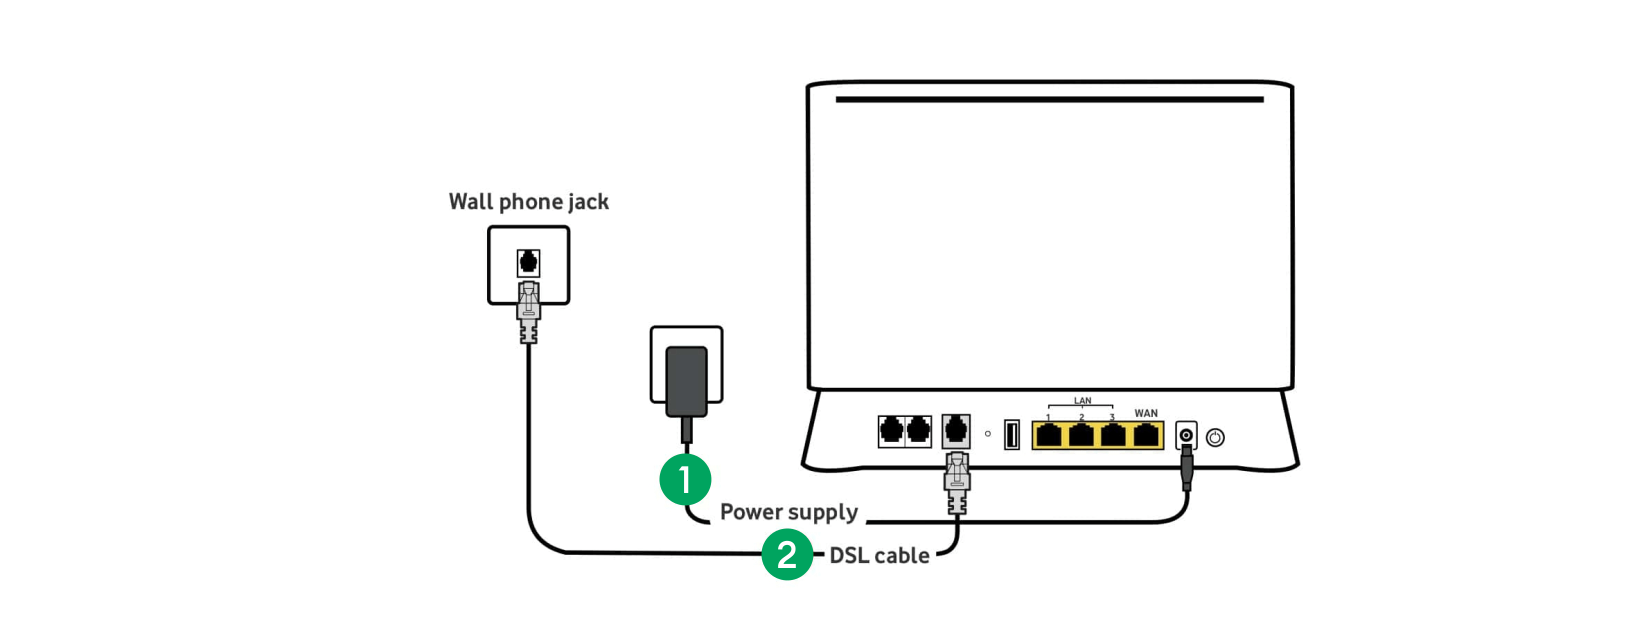
Steps to guide your modem set up
1. Connect to power.
Plug your modem into a power plug near a working wall jack-point and switch on – if your house has a splitter (dedicated internet jack-point) then plug your modem near here.
2. Connect to your wall jack-point.
Plug your DSL/Phone cable into the DSL port on your modem.
Plug the other end of your DSL/Phone cable into the DSL port on your filter and plug this in to the wall jack-point.
Using a splitter? You won’t need a filter – Plug your DSL/Phone cable straight in to the wall jack-point.
3. Connect your devices.
via Ethernet:
Connect your computer, or device, to a LAN port on your modem using an Ethernet cable.
via Wi-Fi:
Your modem may have your Wi-Fi Network Name and Wireless Key code/Password on the back or bottom. Alternatively, you may find this in your modem user guide. On your device, click on the Wi-Fi symbol and select your Wi-Fi network name.
4. Get online.
Try loading a few of your favourite websites. If you’re unable to get online, you may need to change your modem settings.
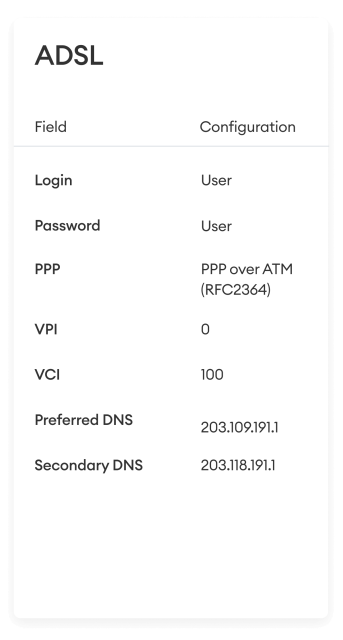
Change your modem settings
Sign in using your modem's username and password.
Navigate to the WAN/Internet settings menu in your modem.
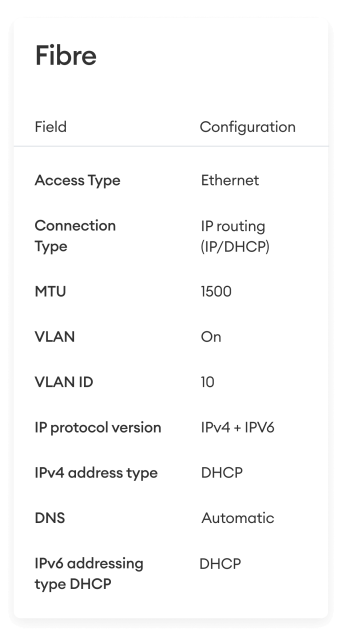
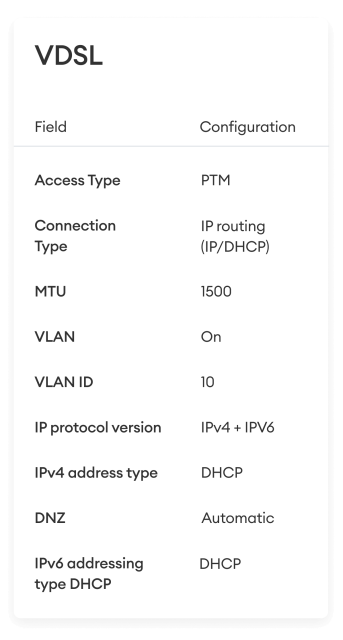
Having trouble setting up your own modem?
Or give our sales team a call on 0800 222 664 to sign up to one of our broadband plans with a One NZ modem, including full support.


