Set up your Cisco Analogue Telephone Adaptor (ATA)
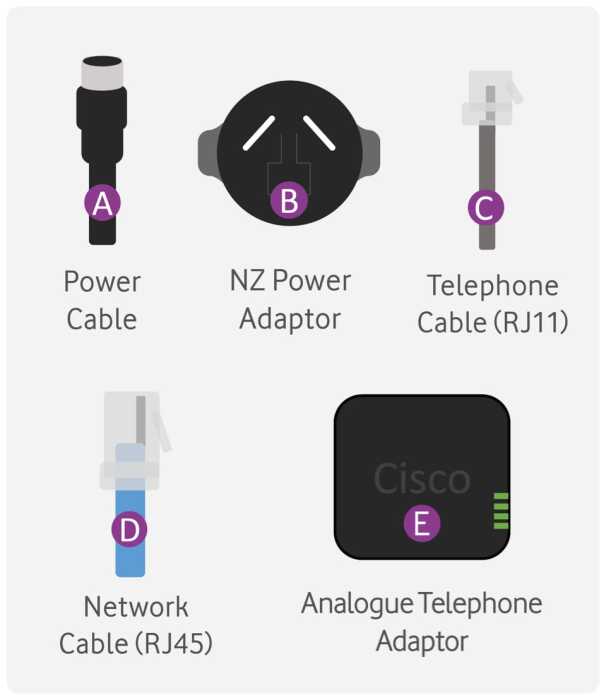
Contained in the box (please note, cables may vary in colour)

1. Connect Analogue Telephone Adaptor (ATA) to power supply
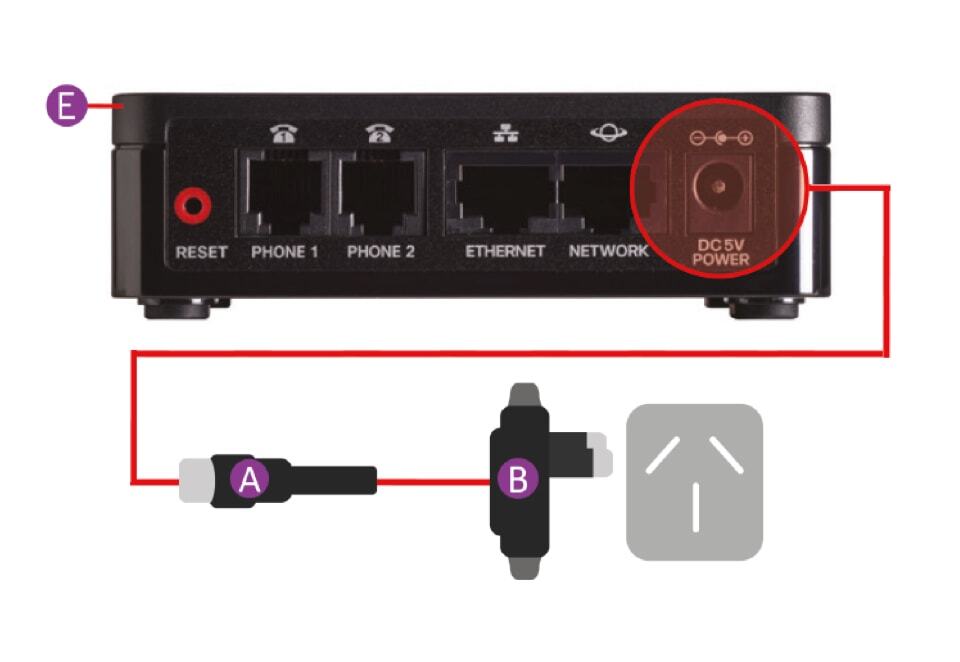
Take the ATA (E) out of the box. Attach power cable (A) to the NZ power adaptor (B). Then plug power cable into the back of the ATA and into a power outlet. The ATA will turn on within a couple of minutes. When the Power LED is a steady green, the system has booted up successfully.

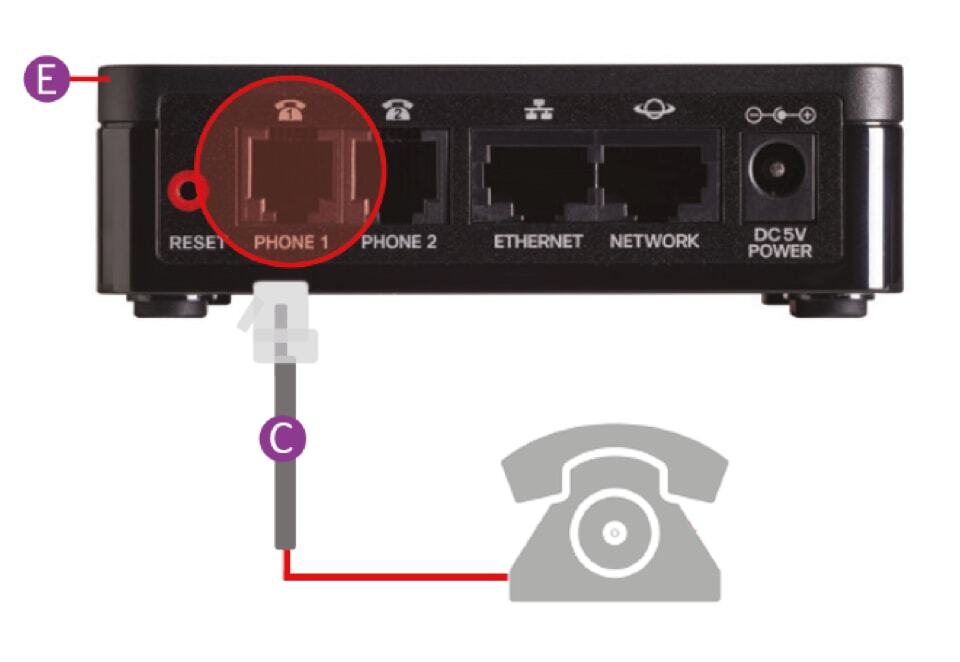
2. Connect Analogue Telephone Adaptor (ATA) to phone.
Take the telephone cable from your existing phone or use the supplied telephone cable (C) and plug it into the back of the ATA (E) into PHONE 1. If your device is configured for 2 lines, plug the second line into PHONE 2.

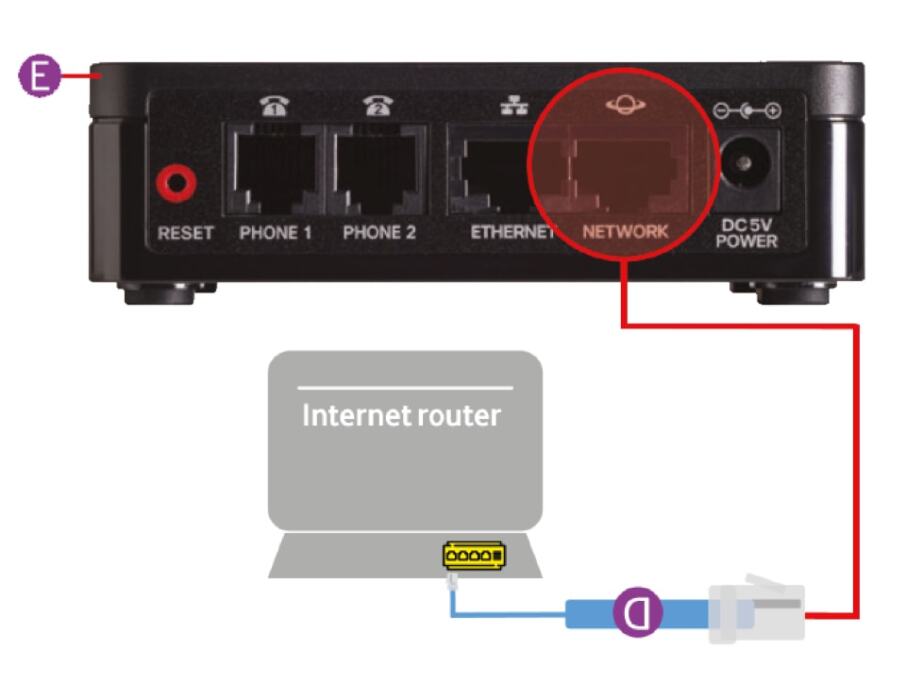
3. Connect Analogue Telephone Adaptor (ATA) to the Internet
Take network cable (D) and plug it into the NETWORK port at the back of the ATA (E). Then plug the other end of the cable into a spare LAN port on your modem or network switch. The Network LED should start to flash green.

4. Your Phone line is now ready to use
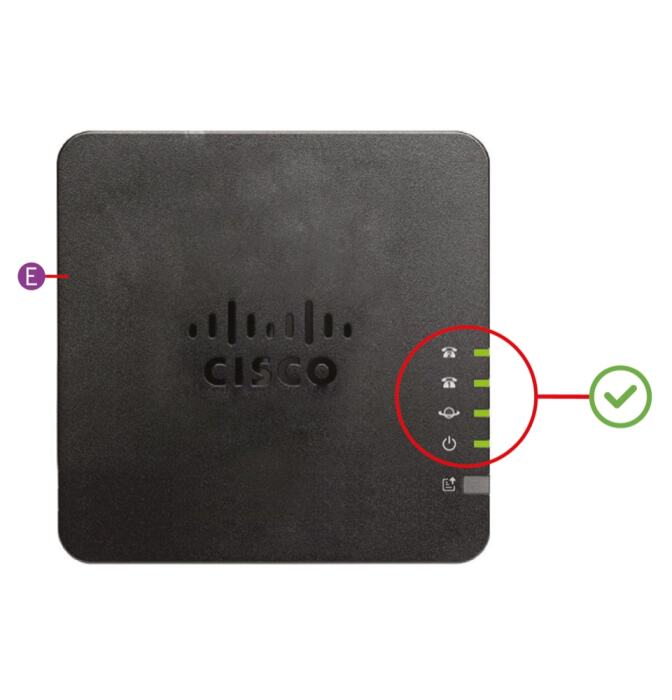
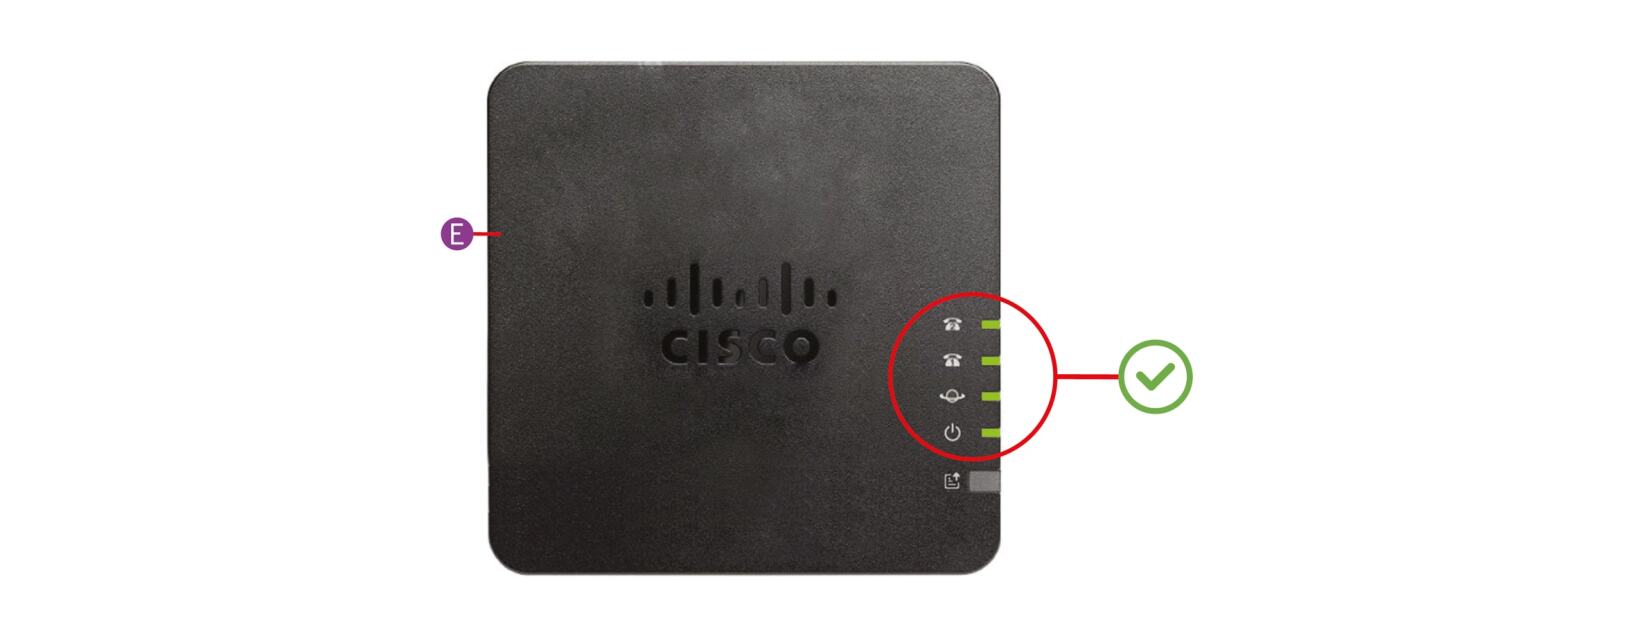
Your phone will be ready to use when the lights on the ATA (E) are on. You should see a green Phone 1, Network and Power LED for a 1 PHONE configuration and a green Phone 1, Phone 2, Network and Power LED for a 2 PHONE configuration. Please allow up to 2 minutes for this.
